
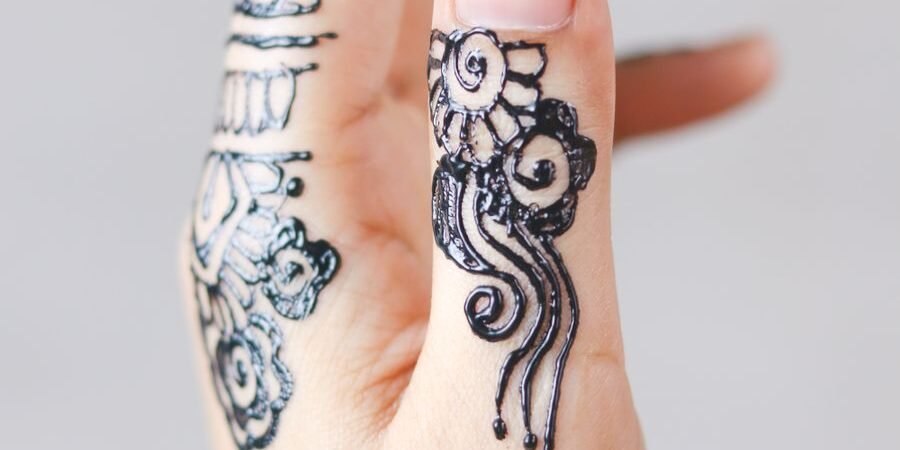
Some of the most wearable henna is also the smallest. A single flower on a thumb, a dotted chain down an index finger, or a thin band of leaves around a ring finger can change how a hand looks without taking over the whole hand. That is the appeal of finger mehndi designs: they are quick, they dry fast, they suit almost any outfit, and they do not get in the way of typing, cooking, or holding a phone. They are also the easiest henna to try at home, because the area is small and a mistake is easy to hide or wash off and redo.
This guide looks closely at finger-only patterns: which designs work on which finger, how to keep the lines clean on such a small surface, how long finger henna takes and lasts, and how to pair it with rings, nail polish, and the rest of a hand design. It also covers the practical side that matters for first-timers — cone control, smudging, and aftercare — and answers the questions people actually ask before they book a finger design or try one themselves.
Why Finger Designs Work So Well
Fingers are narrow, curved, and constantly moving, which is exactly why a small design suits them. A pattern that runs along the finger, rather than across it, follows the natural line of the bone and makes the finger look longer. A design that sits on the side of a finger, where it is visible when the hand is relaxed, looks different from one on the top of the finger, which shows most when the hand is raised for a photograph. Good finger henna uses that difference on purpose: the most detailed work goes where it will actually be seen.
Finger designs also age better than many larger designs, in a practical sense. They fade from the fingertips first, because the fingertips are washed and touched the most, but a simple finger pattern still looks intentional as it fades, whereas a dense palm design can look patchy once the edges start to go. If a finger design fades unevenly, it is also easy to refresh a single finger rather than redoing a whole hand.
Finger Mehndi Patterns, Finger by Finger
The Thumb: Flowers and Mandala Dots
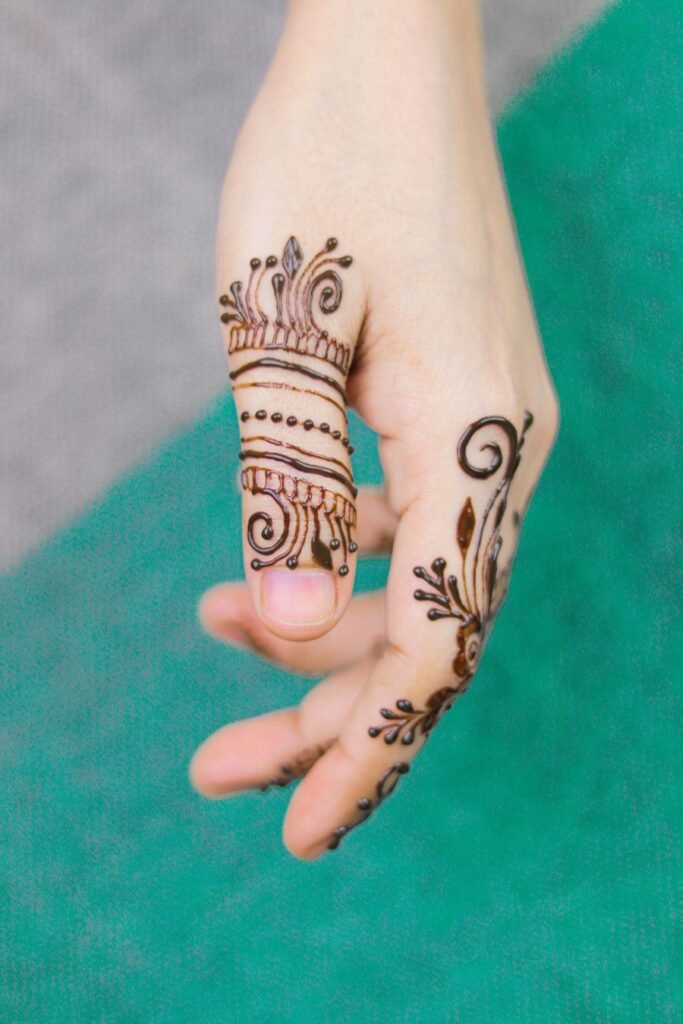
The thumb is the widest finger, so it can carry a slightly larger motif than the others. A single flower with a dotted centre, a small mandala, or a paisley that curves around the side of the thumb all work well. Because the thumb is used for gripping, keep the design slightly away from the pad of the thumb, where it will rub off first, and concentrate it on the top and the side. A thumb design also pairs well with a thumb ring, if the ring sits below the pattern rather than over it.
The Index Finger: Trails and Chains
The index finger is the most photographed finger, because it points, holds a glass, and rests on top of other fingers in photographs. A trail that runs from the knuckle to the fingertip — a vine with small leaves, a dotted chain, or a row of tiny flowers — suits it best. Keep the line thin and even, and avoid a heavy block of colour at the fingertip, which can look blunt and will fade first. If you wear a ring on the index finger, leave a small gap in the pattern where the ring sits.
The Middle Finger: Bands and Jaali
The middle finger is the longest, so it suits bands and net patterns that use its length. A short jaali section in the middle of the finger, framed by two thin lines, looks neat and modern, as does a series of small rings or bands at the joints. Avoid a design that covers the whole middle finger in dense colour, because it can make the hand look heavy, especially if the other fingers are left bare.
The Ring Finger: Delicate and Intentional
The ring finger carries the most meaning, so the design here should be chosen with the ring in mind. A small flower just above the ring, a thin vine that wraps around the finger without covering the ring, or a dotted line that leads the eye to the ring all work. If the design is for an engagement or a wedding, keep it light enough that the ring remains the focus, and ask the artist to work around the ring rather than under it. For brides who want finger detail as part of a larger look, see our guide to bridal mehndi designs, which covers full-hand dulhan henna for weddings.
The Little Finger: Tiny and Clean
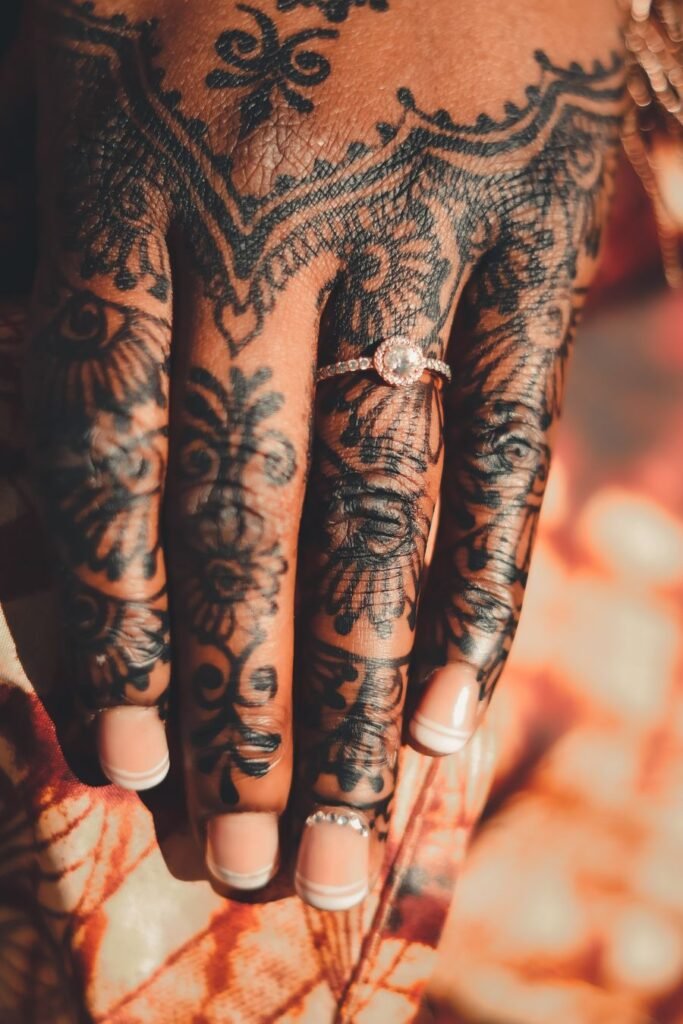
The little finger is easy to overdo. One small star, a single dot trail, or a tiny leaf at the base is usually enough. A heavy design on the little finger can look crowded and will smudge easily, because the finger is thin and moves a lot. If all the other fingers are decorated, a very light little-finger design balances the hand; if only one or two fingers are decorated, the little finger can be left bare.
Minimal Finger Patterns That Look Finished
One Finger Only
Decorating a single finger — usually the index finger or the thumb — is the most understated way to wear henna. It works for workplaces, for people trying henna for the first time, and for occasions where a full hand design would feel too much. The key is to make that one finger look complete on its own: a trail that runs the full length of the finger, with a small motif at the base and a clean finish at the tip, rather than a random dot halfway up. If you are new to finger henna, start here and add fingers one at a time in later attempts.
All Fingers, Lightly
When all five fingers are decorated, the pattern should be lighter on each finger than it would be on a single finger, otherwise the hand looks busy. A common approach is to use the same small motif on each finger — a tiny flower, a dot, or a short leaf — with a thin line joining them across the knuckles. That repetition is what makes the hand look planned rather than random. Keep the fingertips shaded only lightly, or leave them bare, so the fingers do not look shortened.
Finger Tips and Bands
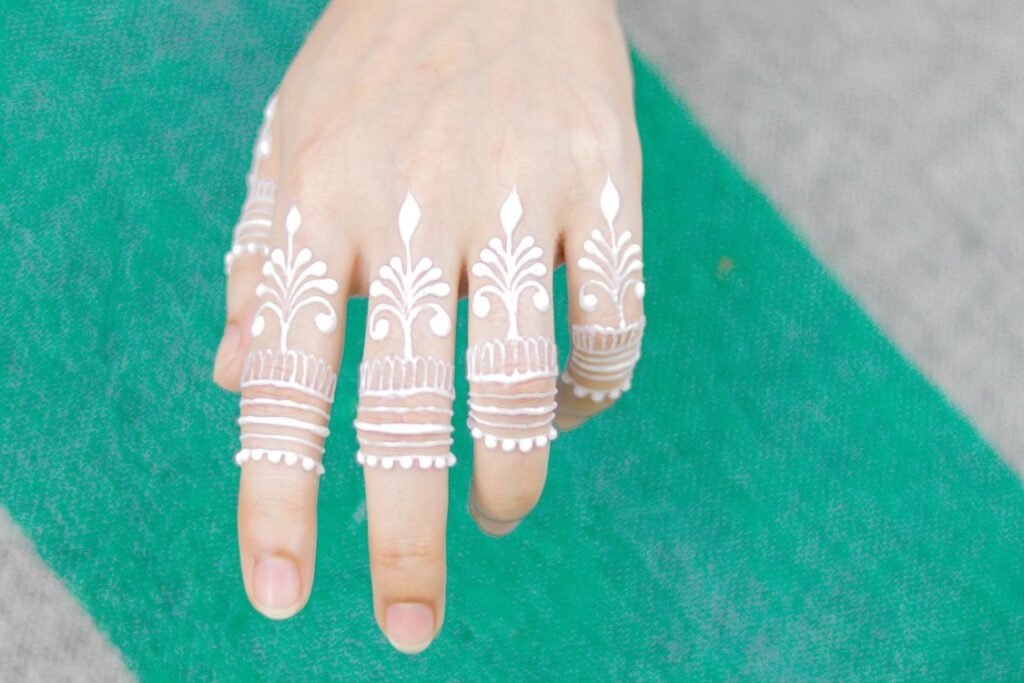
Shading just the fingertips, with a small band at the first joint, is a classic finger design that takes minutes. It suits short nails and natural nails, because the dark tip draws the eye to the nail shape without covering it. For a slightly more detailed version, add a tiny dot or star in the centre of each fingertip. This is also a good design for children and teenagers, because it is quick, it does not require sitting still for long, and it fades evenly.
Minimal Lines, Dots, and Stars
Minimal finger henna is not a lack of design; it is a choice. A single line down the centre of a finger, a row of dots along one side, or a small star on a knuckle can look sharper than a crowded pattern, especially with a modern outfit or a simple dress. Minimal designs also suit people who wear a lot of rings, because the henna does not compete with the metal. The discipline here is spacing: dots should be evenly sized and evenly spaced, or the minimal look quickly looks accidental.
Finger Mehndi Designs Compared
| Pattern | Best finger | How long it takes | How long it lasts | Suits best |
|---|---|---|---|---|
| Single flower on thumb | Thumb | 5–10 minutes | 5–10 days | First-timers, everyday wear |
| Vine or dotted trail | Index finger | 5–15 minutes | 5–10 days | Parties, photographs, dinners |
| Jaali band | Middle finger | 10–20 minutes | 7–12 days | Festive occasions, modern outfits |
| Small flower above ring | Ring finger | 5–10 minutes | 5–10 days | Engagements, weddings as a guest |
| Dot trail or tiny star | Little finger | 3–5 minutes | 4–8 days | Balancing a fuller hand design |
| Shaded fingertips | All fingers | 10–20 minutes | 7–12 days | Quick, classic, all ages |
| Minimal line or dots | Any single finger | 3–8 minutes | 4–8 days | Minimalist outfits, workplaces |
| All fingers, same motif | All five fingers | 20–35 minutes | 7–12 days | Festivals, parties, coordinated looks |
Pairing Finger Henna with Rings, Nails, and Outfits
Rings and henna should be planned together, not added at the last minute. A wide ring will cover part of a finger design, so either leave a gap in the pattern where the ring sits, or place the design above the ring on the fingertip side. Thin stacking rings work well with finger henna because they sit in the natural gaps between joints. If you are wearing a statement ring, keep the henna on that finger especially light, so the ring remains the centrepiece.
Nail polish colour changes how finger henna reads. A dark stain looks strong against nude, pale pink, and clear polish, and softer against deep red or burgundy, which can blend with the henna colour. If you want the henna to stand out, choose a lighter polish or leave the nails natural for the first few days. Apply nail polish before the henna, not after, because remover and polish will fade the stain and can smudge fresh paste.
Outfit matching for finger henna is simpler than for full-hand designs, because the area is small. A finger design in a deep reddish-brown stain works with almost any colour, from black and white to bright festive colours. The main choice is scale: a heavily embroidered outfit can carry a slightly more detailed finger design, while a plain, tailored outfit suits a minimal line or dot pattern. For a fuller hand design to pair with finger work, our guide to simple mehndi designs covers easy henna ideas for front and back hands, and for a seasonal outfit angle, see how to dress for early fall without overcomplicating the look.
Applying Finger Henna: Control, Time, and Stain
Finger henna rewards a light hand. Hold the cone like a pen, with your wrist supported, and draw slowly — a fast line on a narrow finger wobbles, while a slow line stays even. Practise the pattern on paper first, then on the back of your hand, before you try it on a finger. If a line goes wrong, wipe it off immediately with a damp cotton bud and redraw it; once the paste dries, a mistake is much harder to correct cleanly.
Time is on your side here. A single finger takes three to fifteen minutes, all five fingers lightly decorated take twenty to thirty-five minutes, and even a detailed set of finger designs rarely takes more than an hour. That makes finger henna realistic for a lunch break, a pre-party hour, or a festival stall, where a full hand design would be too much of a commitment.
The stain develops in the same way as other henna: orange at first, deepening to reddish-brown over twenty-four to forty-eight hours. Finger stains fade faster than palm stains, because the fingers are washed, touched, and rubbed more often, so expect four to twelve days depending on the pattern and on how much you wash your hands. Fingertip shading fades first, while designs on the sides and tops of the fingers, which are touched less, tend to last a little longer.
Costs are modest compared with bridal work. A single finger or a small finger design from a local artist often costs $5 to $20, and a full set of finger designs $20 to $50, with festival stalls sometimes cheaper. If finger work is added to a bridal or party design, it is usually included in the overall price rather than charged separately, so ask before you book. As with all henna, avoid black henna cones, which are not natural henna and can cause serious skin reactions.
Aftercare for Finger Henna
Keep the paste on for at least four to six hours, and overnight if you want the darkest colour. Finger paste dries quickly because the area is small, but it also flakes off easily if you use your hands, so avoid typing, cooking, and washing up until the paste is fully dry. Once dry, scrape the paste off rather than washing it off, apply a little oil, and keep the fingers away from water for a few hours. In the following days, moisturise daily and avoid harsh soap, hand sanitiser, and exfoliating scrubs on the decorated fingers, all of which fade the stain quickly.
Mistakes That Spoil Finger Designs
- Drawing too thick a line for a narrow finger, so the pattern looks heavy and blurs as it dries.
- Covering the ring finger completely, so a ring or engagement ring is hidden or sits awkwardly over wet paste.
- Applying nail polish or remover after the henna, which fades the stain and can smudge the pattern.
- Using the hands too soon, before the paste has dried, and smudging a fingertip design.
- Choosing a dense pattern for the little finger, which is thin, moves a lot, and smudges easily.
- Skipping a patch test on sensitive skin, especially before a first finger design for a child or teenager.
- Using black henna, or a cone with no ingredient information, to get a darker colour faster.
Finger Mehndi: Questions People Ask Most
How long does a finger mehndi design take?
A single finger takes three to fifteen minutes, depending on detail. All five fingers, lightly decorated, take twenty to thirty-five minutes. Even a detailed set of finger designs rarely takes more than an hour, which is why finger henna is popular for last-minute occasions.
How long will finger henna last?
Expect four to twelve days. Finger stains fade faster than palm stains because the fingers are washed and touched more often, and fingertip shading fades first. Designs on the sides and tops of the fingers usually last a little longer than those on the pads.
Is finger mehndi good for beginners?
Yes — it is the best place to start. The area is small, the patterns are simple, and a mistake is easy to wipe off and redo. Start with a dot trail or a single flower on one finger, then move to vines, bands, and jaali as your control improves.
Can I wear finger henna to work?
Usually, yes, if the design is minimal. A single line, a dot trail, or a small flower on one finger reads as a subtle detail rather than a full henna design, and it does not interfere with typing or handling objects once the paste is removed. Check your workplace dress code if it is strict about visible body art, and choose a light design for a first time at work.
Which finger should I decorate first?
Start with the index finger or the thumb. Both are wide enough to work on comfortably, both are visible in photographs, and both carry a simple trail or flower well. The ring finger is best decorated with the ring in mind, and the little finger should be kept very light, so neither is the best first choice for a beginner.
How do I keep finger henna from smudging?
Keep the hand still until the paste is fully dry, avoid using that hand for typing or cooking in the meantime, and do not cover wet paste with a glove or a sleeve. If you need to use your hands, decorate one hand at a time, so the other hand stays free. Once the paste is dry, it is much less likely to smudge, though it can still flake if rubbed hard.
A Good Place to Start
Pick one finger, one simple pattern, and a quiet half-hour. A dotted trail on the index finger or a small flower on the thumb will teach you more about cone control, spacing, and drying time than reading about ten patterns. Once that first finger looks clean and even, add a second finger, then a matching set, and before long you will have a sense of which patterns suit your hands, your rings, and your everyday life — which is the whole point of finger henna in the first place.
Photograph note: the photograph in this article is a real finger henna photograph from Pexels, showing finger mehndi designs on a thumb and index finger with floral and net patterns. It is included as a reference for close-up finger work, rather than as a pattern to copy exactly.